Making graphics for ATP #3: Creating surfaces with Substance
A note before we start: Substance went through a major update during my texturing adventure, and its user interface has changed a bit since I started. Screenshots should be quite up to date, but some obsolete information may have slipped through. Let me know if you notice something weird.
Baking
Baking, painting and working with layers in Substance can be a complicated task especially, if one is not familiar with physics based rendering. Luckily, there are tons of quality tutorials all over the internet, so I don't have to dive deep into technical details. Instead, I try to describe my (probably flawed) workflow and give some helpful hints.
I started by creating a new Substance-project from the file “all.fbx” (the one with all LOD models, exported in the previous episode). I'm using the “ASM - PBR Metallic Roughness (starter_assets)” -template, and I disabled “Auto-unwrap” as the UV-mapping is already done in Blender. Each LOD model will be imported into its own texture set, that I renamed accordingly. I will also delete the default layer (“Layer 1”) from all texture sets, since they will be replaced anyway.
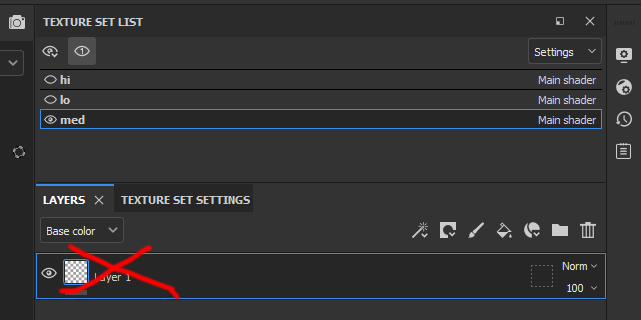
Beginner’s tip: alt + click hides all texture sets but the clicked one. This is useful when there are more than two sets.
Before assigning materials, Substance needs to calculate some information about the hi-poly model and store it into its mesh maps. Mesh maps are kind of meta-textures that Substance uses when procedurally creating natural looking wear, dirt, rust and other effects. This calculation process is called baking (as are many other things; don’t get confused). I tend to bake all mesh maps apart from “Thickness” that is not needed in fully opaque surfaces.
Baking screen is opened by selecting the “Texture set settings” -tab and clicking the “Bake Mesh Maps” -button. The screen can be quite overwhelming and I haven't familiarized myself with all the parameters. The screenshot below shows some of the settings I'm using.
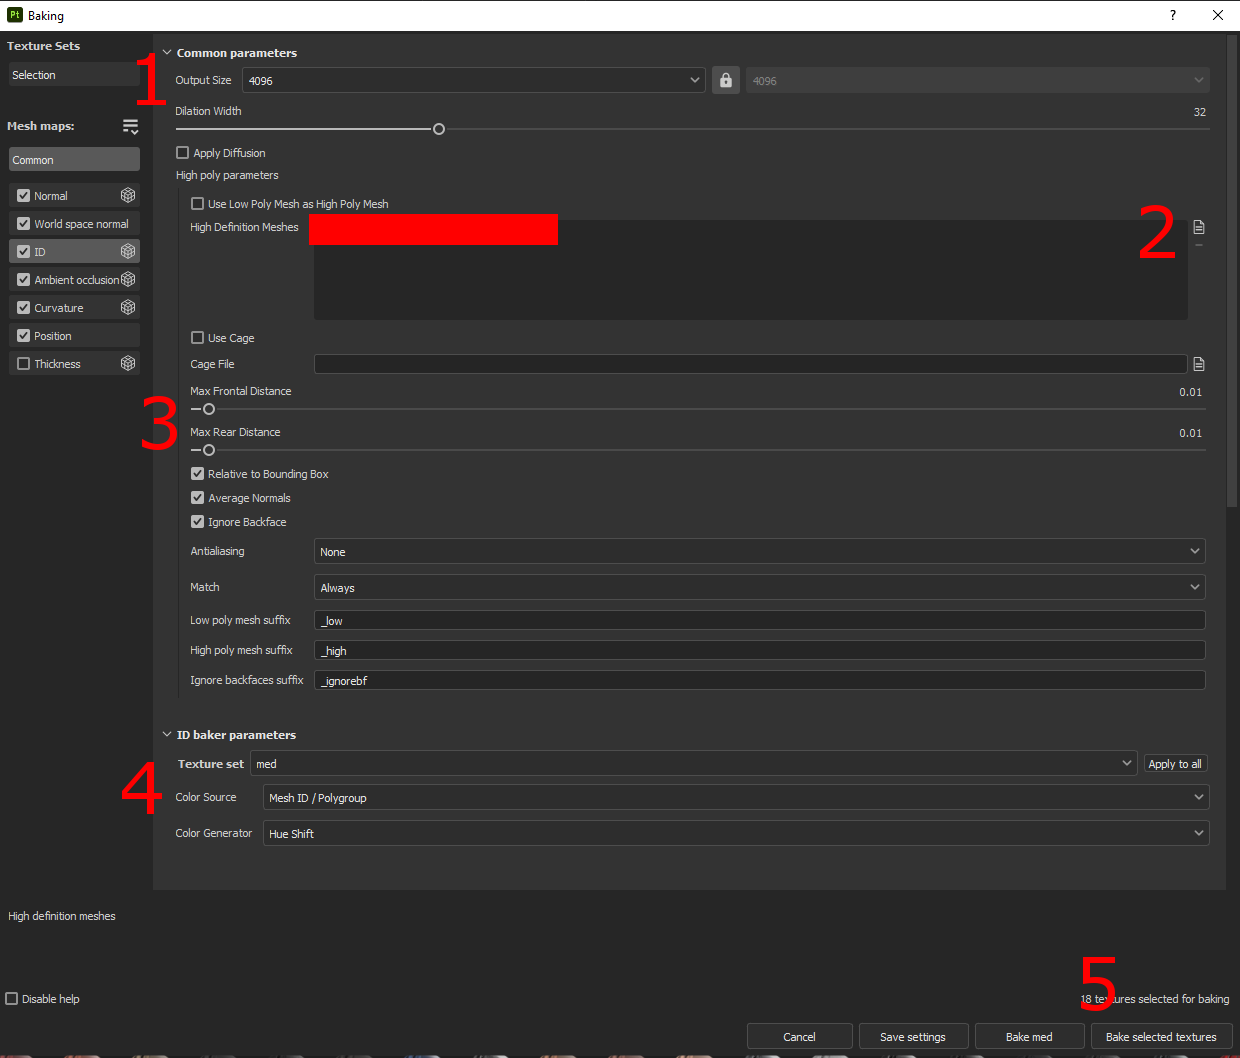
- (1) I use the "Output Size" value 4096, which is one option larger than my hi-poly output texture (2048).
- (2) High definition mesh will be the “ids.fbx” I exported in the previous chapter (a mesh that contains the color IDs). During baking, the hi-poly details will be projected onto each LOD object.
- (3) Max frontal/rear distances can be hard to get right. Usually I start with 1 cm (0.01) and try to keep the values as small as possible. In this case, I finally ended up to 7 cm in order to include the protruding geometry that is missing from the low poly mesh (mostly pipes and lights). If color IDs keep disappearing, bleeding or behaving otherwise strangely on a low poly model, these values are probably the ones to blame. For very complex cases, making a cage object (mesh that encapsulates the hi-poly mesh as tightly as possible) may be preferred, but I haven’t tried that yet.
- (4) This is important and caused me trouble before I realized what to do: select ID map and set “Color source” to be “Mesh ID / Polygroup”. Then click “Apply to all”, so changes will be properly updated for all texture sets. Without this change, IDs get sometimes overlapped and assigned in strange ways (assuming the color IDs are set the way I did in Blender).
- (5) Baking is done by clicking the button at the bottom. Note that you can bake texture sets separately and thus use different settings for each LOD model. Low poly models generally require rather high distance values that may cause artifacts in high poly models. When experimenting with distances, I tend to speed up the process by baking only ID maps (by deselecting all other mesh maps), and keeping only the IDs visible in view screens (use dropdown in the top-right corner of 3D and 2D views as shown below). When IDs look right, I’ll enable other maps and re-bake.
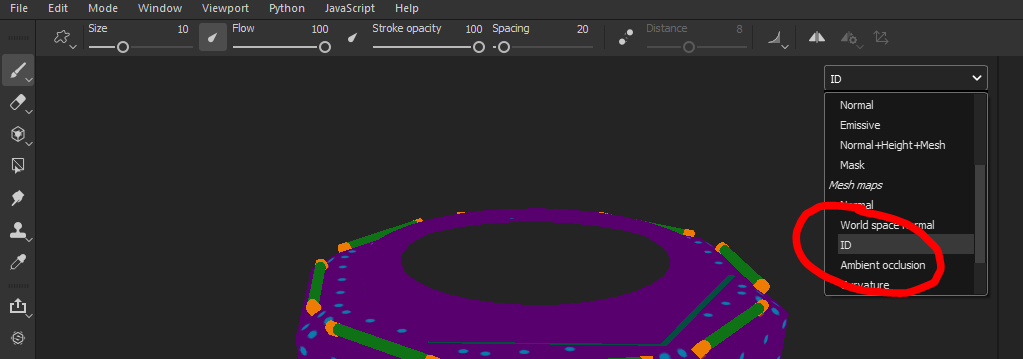
Note: probably because of my then-obsolete GPU drivers, Substance crashed quite often during the baking process. I had to turn off live baking ("Edit" -> "Settings" -> "Enable live preview baking process") to make it work.
The end result looks quite nice. On the left is the hi-poly mesh, and on the right is the lowest poly version with all the calculated mesh maps baked on. The difference is hard to see, and during the gameplay, it is practically nonexistent.

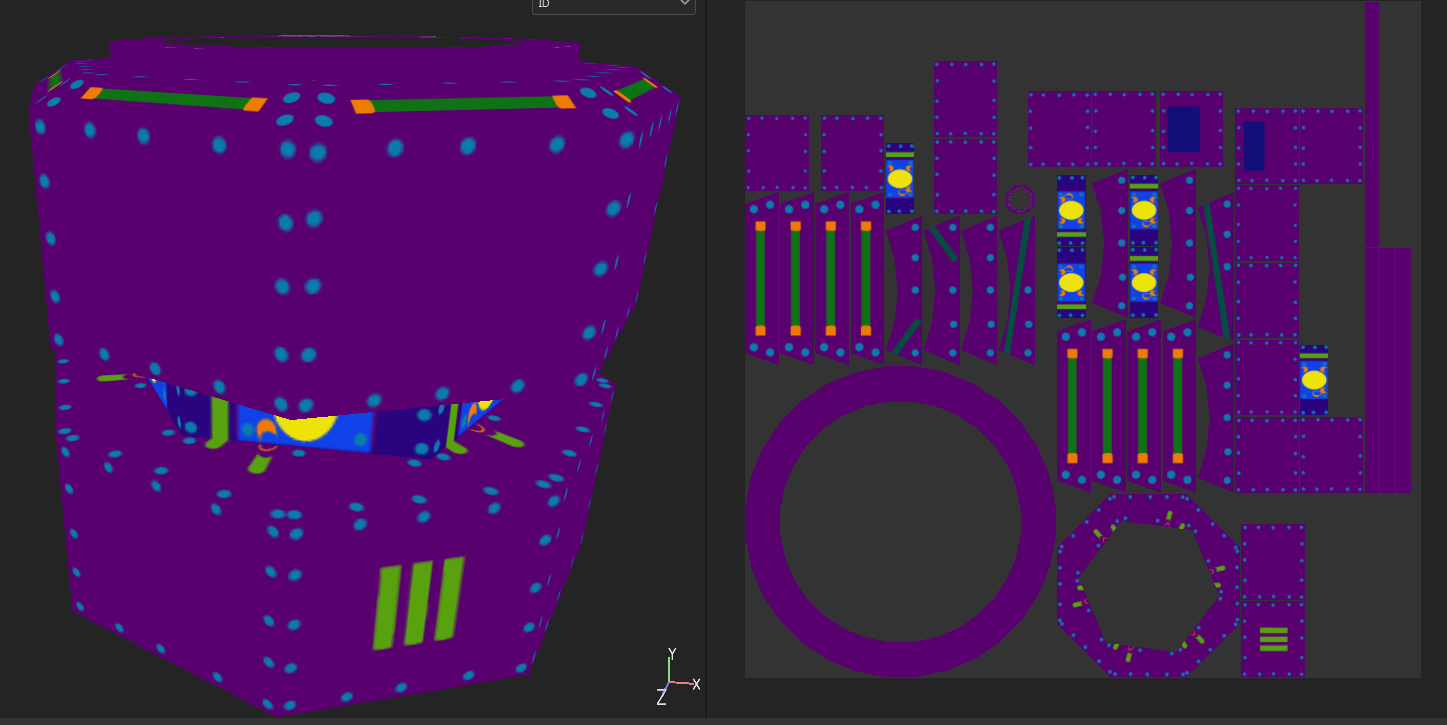
The image below shows how the color IDs are baked onto low poly model’s ID-map. Every color can now be easily assigned with a different material. Note that the colors Substance uses may differ from the Blender colors. This doesn't matter since they only mark the positions for the final materials.
Assigning materials
When the maps are properly baked, it is time to start the actual painting. I make the high poly model first, and then just copy-paste the layers to low poly versions.
Substance’s smart materials may be boring, but they are great for prototyping. With little adjustments to "Steel Painted Worn"-material I created a rusty, low-saturated green that seems like a good starting point. I’ll be using it as a base material for all modules, and probably change it in the future, when all graphics can be put into context. I created a new smart material "ATP_ModuleBase_1" that can be later re-used. Own materials are made by right clicking the edited layer and selecting "Create smart material".
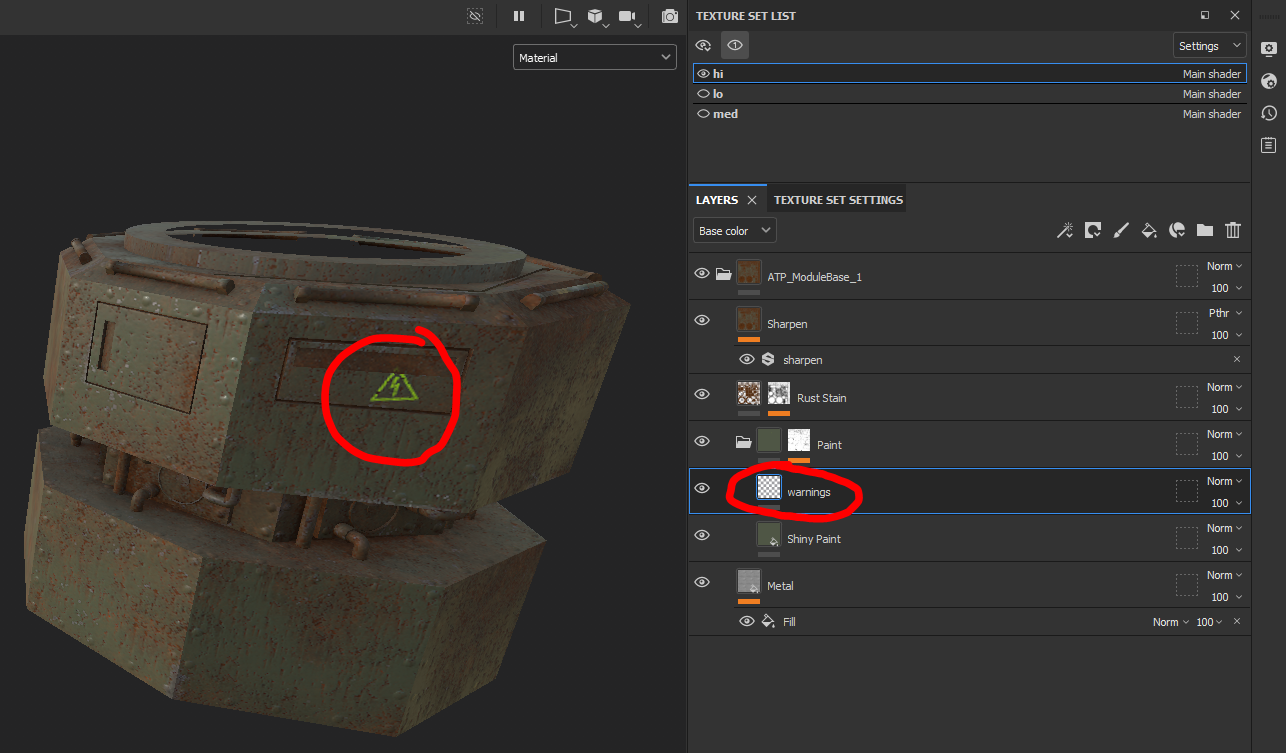
As the top-right hatch conceals the electric parts, a warning sign is definitely needed. I added a new "warnings" -layer inside the Paint-folder right above the green base color, so it is affected by wear and rust. Substance happens to have an electricity warning icon in predefined brushes (alphas), so it was easy to paint one onto the newly created layer with a yellow color.
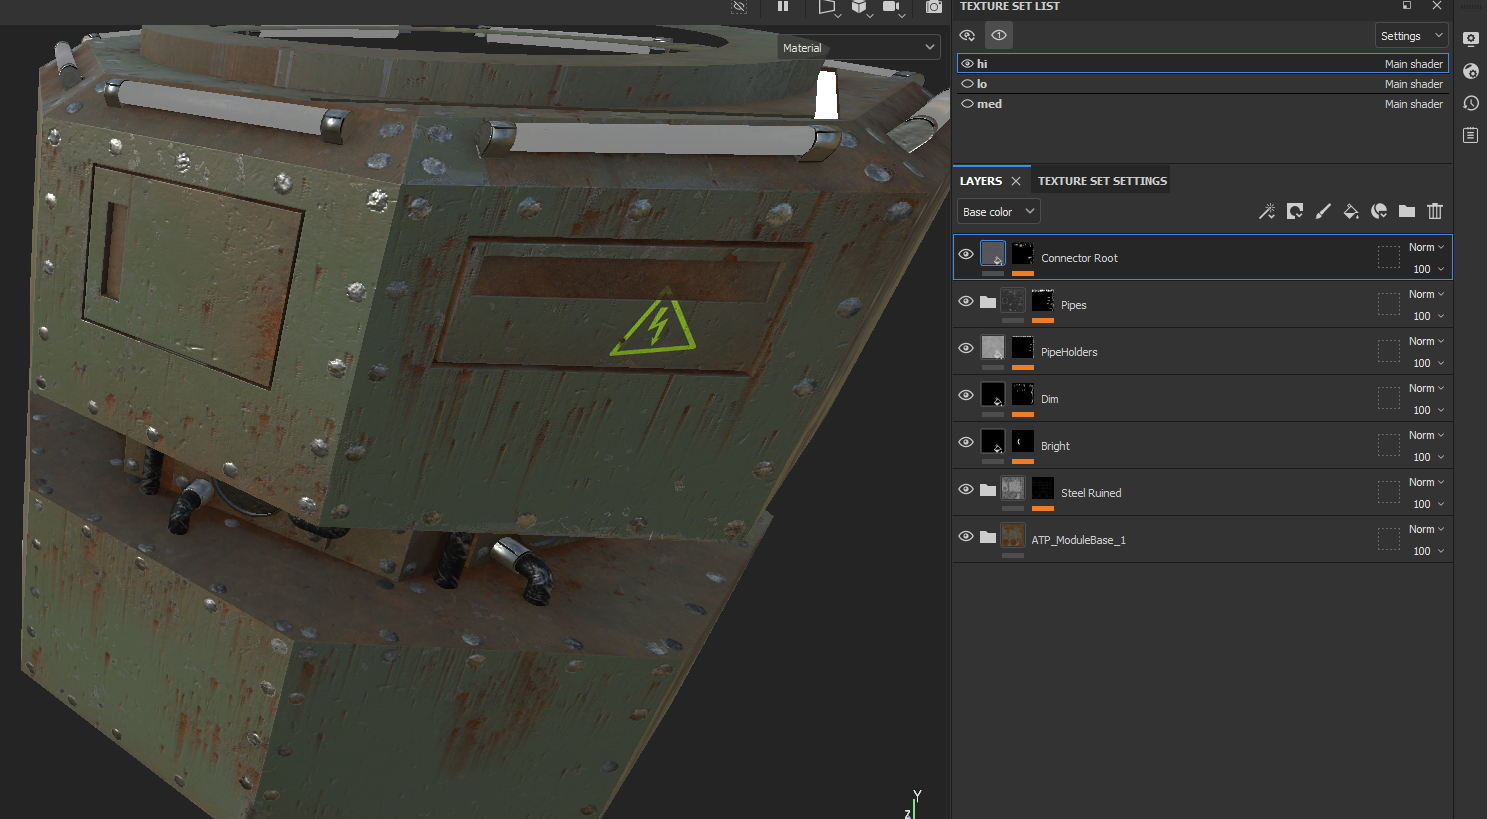
By default, materials are applied to the whole mesh. For texturing the other details, I utilized the color IDs. After dragging the detail material (bright metal for bolts, black rubber for pipes etc.) into the layer list I right-clicked the layer and selected “Add mask with color selection”. Material can be assigned to a specific color IDs by clicking “Pick color” in the mask settings and selecting a color from the view. It is a neat and easy feature that took me a while to find.

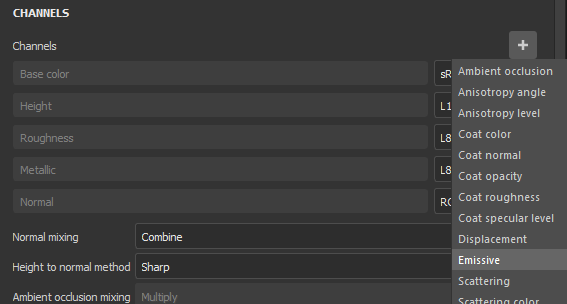
Lights need an emissive channel that isn’t included by default. It can be added by clicking the “+” button in the "Channels"-section under "Texture set settings"-tab. Now one can also paint emissive surfaces that aren't affected by shading.
I used grayscale colors as emissive values. Later in Unity, they can be multiplied by any RGB-value in order to give the emission a desired color. Arrow’s clean white gives more intensive light than the gray of tube lights, and lights can be turned off by multiplying the emissive value by zero. More about this in the next chapter.
This is the final high-poly model when all the material layers are added and assigned.
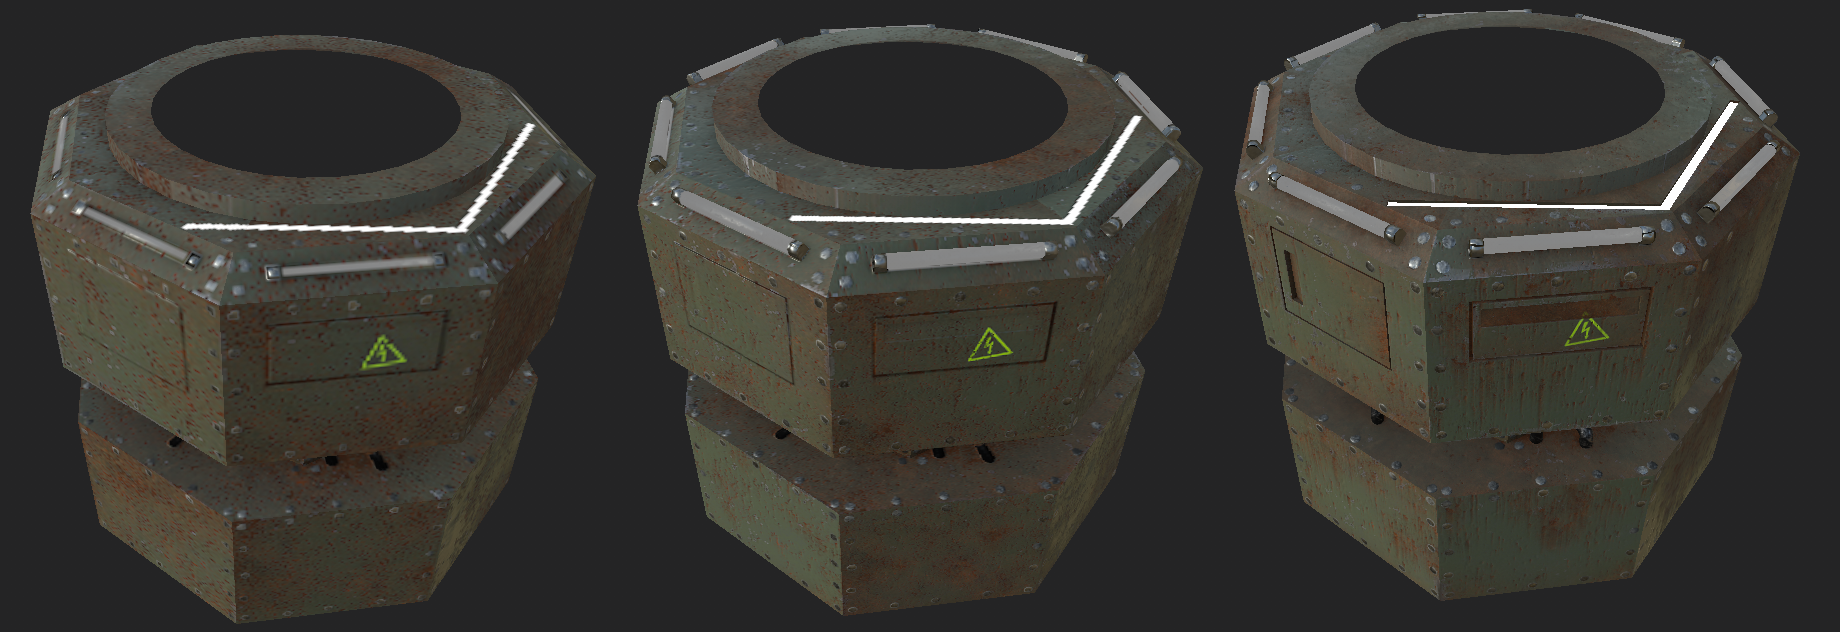
Now the layers can be copied and pasted from "hi" to other texture sets. Image below visualizes the final models. Low, medium and high poly models have texture sizes 512x512, 1024x1024 and 2048x2048 respectively. Texture size can be selected individually for each texture set under “Texture set settings” -tab.
Exporting the textures
The last step is to export the textures by selecting "File" -> "Export textures". Output template depends on the tools, but I'll be using Unity’s URP with each texture set having its own resolution.

With these settings Substance creates four different images for each texture set, totaling 12 files. In the image below are the low-poly textures. From left to right: one texture for the albedo colors (and transparency that we're not using yet), one for metallic/smoothness information, one for normals and one for emission.

And that's it. We now have LOD models ("all.fbx") and a set of texture images. In the next chapter, I'm going to combine them in Unity.
Thank you for making it this far. I hope there was something useful. And as always, feedback is highly appreciated.
Get Avaruustaistelupeli
Avaruustaistelupeli
Space combat arcade simulator for one to four players
| Status | In development |
| Author | mobilelast |
| Genre | Shooter, Simulation |
| Tags | Arcade, Local multiplayer, Multiplayer, Space, Top down shooter |
| Languages | English |
| Accessibility | Interactive tutorial |
More posts
- Avaruustaistelupeli 0.5.2Apr 23, 2023
- ATP test session 28.1.2023Feb 15, 2023
- ATP test session 21.1.2023Jan 31, 2023
- Avaruustaistelupeli 0.5.1Jun 10, 2022
- Making graphics for ATP #7: Moving partsApr 29, 2022
- ATP test session 11.3.2022Mar 22, 2022
Leave a comment
Log in with itch.io to leave a comment.